After two weeks, the next part of the course will be unlocked, where you begin working with watercolor.
This course is suited for both beginners and those who already draw but want to build a clear foundation and work with more confidence.
Step by step, you will develop an understanding of the portrait — from form and construction to light and tone, all the way to working with color in watercolor.
This is not about simply copying. You will learn to understand how a portrait is built and why certain decisions are made along the way. The course combines theory, practical exercises, and complete portraits.
You will also receive assignments for independent practice, along with a guide for your continued development.
Course Structure
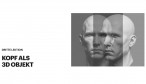
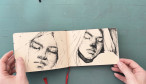
1. Anatomy and Construction of the Head
- Simplified anatomy of the head
- Proportions (front view)
- The head in ¾ view and in motion
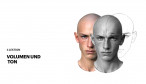
- Volume, light, and planes
- Practical exercises
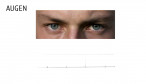
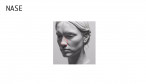
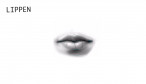
2. Individual Facial Features
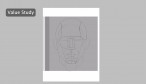
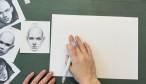
3. Sketching Techniques and Exercises
- Quick sketches and line work
- Shading techniques
4. Watercolor and Color
- Materials and my color palette
- Fundamentals of watercolor technique
- Different techniques in portraiture
- Color mixing and skin tones
- Tonal exercises in watercolor
- Differences between skin tones
5. Step-by-Step Portraits
- Portrait in front view (glazing technique)
- Monochrome portrait (wet-on-wet)
- Male portrait (wet-on-wet)
- Looser, expressive portrait
Important Note Before You Start
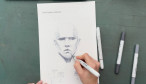
The first part of the course is dedicated to drawing — anatomy, sketching, and understanding form.
I encourage you to give this section your full attention and take your time with it. In my approach, drawing plays a central role. The lines remain visible — they are part of the image — and much of the final result is shaped right here. Everything that follows, whether color or technique, builds on this foundation.
The first unit, covering anatomy, proportions, and sketching, is already open for you. Work through the exercises at your own pace, step by step — because this is exactly where the understanding develops that you will need for everything ahead.
Outcome
You will learn to understand the head constructively, work with light and color, and create portraits with confidence and independence
More details +
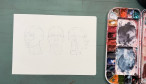
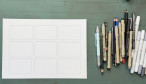
Supply List
Paper For watercolor work, I recommend: — Watercolor paper, cold pressed, 300 g/m², 100% cotton I use Hahnemühle "The Collection," but you can use any other brand as well. For sketches: — Simple cellulose sketch paper, approx. 120–170 g/m²
Colors
- Vermilion (Mijello)
- Red Brown (Mijello)
- Cobalt Blue (Winsor & Newton)
- Alizarin Crimson (Winsor & Newton)
- Cobalt Turquoise Light (Winsor & Newton)
- Payne's Grey (Winsor & Newton)
- Neutral Tint (Winsor & Newton)
- White Gouache (Schmincke)
- Naples Yellow (Winsor & Newton)
Alternative / additional colors:
- Ultramarine (Winsor & Newton) — as alternative to Cobalt Blue
- Cadmium Red (Winsor & Newton) — as alternative to Vermilion
- Cadmium Yellow (Winsor & Newton) — as alternative to Naples Yellow
Brushes
- A large, soft flat brush (for glazing and larger areas)
- A medium round brush — e.g. from the Da Vinci Rabi Alieva Set
- A small synthetic brush for fine details You are welcome to use your own favorite brushes as well.
Additional Materials
- Sketchbook or notebook
- Mechanical pencil HB or 2B, soft pencil (e.g. 8B)
- Black fineliner (0.03 mm)
Optional (not required for the course) This section is entirely optional and not necessary to complete the course successfully. If you would like to experiment further:
Markers
- Copic Markers (grey tones: 0, 1, 3, 5, 7)
- Special marker paper
Fineliners & Brush Pens (Pigma)
- Grey fineliners (0.03 mm)
- Black fineliners (size 01)
- Brush pens (black and brown)